How to Braise Meat: A Step-by-Step Guide
Author: Our Place | September 28, 2026 | Time to read: 9 min

Braising is a method for turning tougher cuts of meat into a tender, delicious dinner with a flavorful sauce. The technique is simple: You brown the meat first in a braiser pan, add a little liquid, then cover the pan and let it cook slowly. The results are phenomenal, and the reason many chefs fill their restaurant dining rooms night after night.
If you’re here with short ribs, pork shoulder, lamb shanks, or another cut you’re not quite sure what to do with, the important decisions are simple: how much liquid to add, what temperature to use, and how to tell when the meat is ready. This guide walks you through each one.
Table of contents
What is braising?
Braising combines two kinds of heat. First, you brown the food in an uncovered pan. Then, you add some liquid, cover the pan, and let everything cook slowly until tender.
Each stage brings something different to the finished dish. Searing develops color and flavor. Slow cooking gives tougher cuts time to soften and lets the braising liquid become a sauce.
The amount of liquid helps distinguish braising from stewing and roasting:
Method |
Liquid level |
Heat |
Best for |
Braising |
One-half to two-thirds up the sides |
Low, slow, covered |
Large pieces of tough cuts |
Stewing |
Fully submerged |
Low, slow, covered |
Small, uniform pieces cooked down into a sauce |
Roasting |
None |
Dry, uncovered |
Tender cuts and vegetables you want browned all over |
These aren’t rigid categories. Add a little more stock and your braise may begin to look like a stew. Leave the lid off at the end and it may finish more like a roast. What matters is the result: tender food with a flavorful liquid around it.
The best cuts for braising, and which ones to skip
Braising was made for cuts with plenty of fat and connective tissue. Shoulder, shank, rib, belly, and thigh can be chewy when cooked quickly, but become tender over a few unhurried hours.
Lean cuts are better suited to quicker cooking. The American Meat Science Association notes that cuts with less connective tissue, including loin steaks and pork chops, are generally most tender when cooked quickly over higher heat.
Cut or protein |
Braise it? |
Why |
Beef chuck roast |
✅ Yes |
Well-marbled, widely available, and easy to shred or slice |
Bone-in beef short ribs |
✅ Yes |
Rich and deeply flavored, with bones that add body to the sauce |
Beef brisket |
✅ Yes |
A substantial cut that becomes tender with enough time |
Oxtail |
✅ Yes |
High in connective tissue, which gives the braising liquid body |
Pork shoulder |
✅ Yes |
Fatty, flavorful, and forgiving during a long cook |
Pork belly |
✅ Yes |
Braise it soft, then crisp the top separately |
Lamb shanks |
✅ Yes |
Meaty, rich, and well suited to individual servings |
Bone-in chicken thighs |
✅ Yes |
A quicker braise that stays juicy and takes on plenty of flavor |
Firm or extra-firm tofu |
✅ Yes |
Different reason, same method. See below |
Beef tenderloin |
❌ No |
Too lean. Braising dries it out |
Boneless chicken breast |
❌ No |
Goes stringy long before it goes tender |
Pork loin chops |
❌ No |
Better seared hot and served at 145°F |
Save beef tenderloin, boneless chicken breast, and pork loin chops for faster methods. They don’t contain the connective tissue that makes a long braise worthwhile, so they’re more likely to dry out before the sauce is ready.
Tofu works for a different reason. You aren’t breaking down connective tissue. You’re giving the tofu time to absorb the sauce around it. Use less liquid, choose plenty of flavor, and keep the cooking time short.
Choosing your braiser
Look for a pan with a wide base, enough depth to hold liquid, and a well-fitting lid. It should also move safely from the stovetop to the oven.
A wide cooking surface lets you brown meat in a single layer. The sides contain the braising liquid without fully submerging the food, while the lid slows evaporation during a long cook. When one pan can handle every stage, the browned bits from the sear stay right where you want them: in the sauce.

For short ribs, brisket, oxtail, and other braises that begin with high heat, our Titanium Braiser Pro is built for a deep sear. Its coating-free NoCo® titanium interior can move from the stovetop to the oven, with enough room to brown larger cuts without crowding.
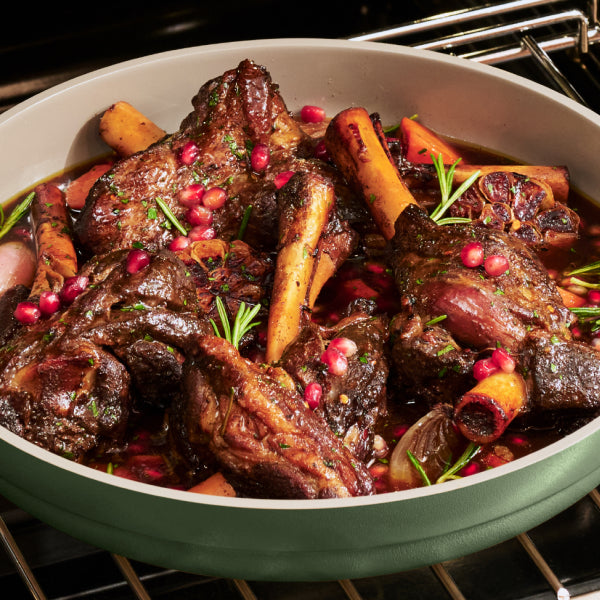
Our Dual Handle Always Pan® is well suited to chicken thighs, tofu, and braising vegetables. Its wide base gives you plenty of room to brown multiple pieces, while its Thermakind® ceramic nonstick coating helps delicate ingredients release cleanly. The pan is oven safe up to 450°F, and its glass lid is oven safe up to 425°F for cooking covered in the oven.
If you’re comparing materials, our guide to cast iron and ceramic cookware explains where each one shines.
How to braise meat, step by step
1. Season and dry the meat.
Pat the meat dry with paper towels, then season it with salt. A dry surface browns more readily, while excess moisture can leave it pale. If you have time, season the meat one to two hours ahead and refrigerate it uncovered.
2. Brown it in batches.
Add a thin layer of oil to the pan and heat it until it’s shimmering. Arrange the meat in a single layer with a little room between each piece. Let it cook undisturbed until well browned, usually three to four minutes per side.
If the pan feels crowded, work in batches. A few extra minutes here will give the finished sauce much more depth.
3. Add the aromatics.
Transfer the browned meat to a plate. Lower the heat slightly, then add chopped onion, carrot, celery, garlic, or any aromatics your recipe calls for. Cook until softened and beginning to brown, about five to seven minutes. Tomato paste, spices, and sturdy herbs can go in now, too.
4. Deglaze the pan.
Pour in a little stock, wine, beer, or water. As it begins to simmer, use a wooden spoon to loosen the browned bits from the bottom of the pan. Those bits are fond, and they carry the flavor developed during searing.
Stock is a versatile choice. Wine can add acidity, while beer brings maltiness and a little bitterness. Water also works, especially when the meat, aromatics, and spices already bring plenty of flavor.
5. Add the braising liquid.
Return the meat to the pan, then add enough liquid to reach about halfway up its sides. Keep crisp skin or a scored fat cap above the liquid when possible.
Bring the liquid to a gentle simmer, cover the pan, and transfer it to the oven. For most beef, pork, and lamb braises, 300°F is a good place to begin.
6. Cook until tender.
Let the braise cook gently, checking near the beginning of the suggested time rather than opening the lid repeatedly. It’s ready when a fork or skewer slides into the meat easily. If the meat still feels firm, cover the pan and give it more time.
7. Finish the sauce.
Transfer the meat to a plate and skim excess fat from the surface of the braising liquid. If the sauce is thinner than you’d like, simmer it uncovered on the stovetop until it lightly coats the back of a spoon. Taste, season, and return the meat to the pan before serving.
It’s a bit of a myth that searing seals in moisture. Searing gives the braise its browned flavor and color. If one side comes out a little paler, dinner will still be fine.
The oven is usually the best place for the long, covered stage of cooking because it surrounds the pan with steady heat. But you can also braise on the stovetop. Keep the burner low, maintain a gentle simmer, and turn the meat occasionally so the bottom doesn’t cook faster than the top.
How long do you braise meat for?
The cut will tell you more than the clock. Use these ranges as a starting point, then check for tenderness.
Food safety and braising tenderness aren’t always the same thing. According to USDA guidance on doneness and safety, poultry is safe at an internal temperature of 165°F, while whole cuts of beef, pork, veal, and lamb are safe at 145°F with a three-minute rest. Tough cuts are often cooked beyond those temperatures so their connective tissue has time to soften.
Protein |
Uncovered on the stovetop |
Covered in the oven |
Oven temp |
Ready when |
Bone-in beef short ribs |
10 to 12 minutes, all sides |
2.5 to 3 hours |
300°F |
The meat pulls back from the bone |
Pork belly |
8 to 10 minutes, fat side down first |
2 to 2.5 hours |
300°F |
A skewer slides in with no resistance |
Bone-in, skin-on chicken thighs |
6 to 8 minutes, skin side down |
40 to 50 minutes |
325°F |
165°F at minimum, more tender closer to 185°F |
Firm or extra-firm tofu |
6 to 8 minutes, two sides |
20 to 30 minutes |
325°F |
The liquid has reduced and glazed the tofu |
A few notes for each:
Short ribs: English-cut ribs give you one thick piece of meat per bone. Try the method with our red wine-braised short ribs.
Pork belly: Score the fat before searing and keep the top above the liquid. For a crisp finish, uncover the pan and raise the oven to 425°F for the final 10 to 15 minutes. Our braised pork belly with taro offers another approach.
Chicken thighs: Keep the skin above the liquid and begin checking at 40 minutes. Try our crispy braised chicken thighs with cabbage and bacon.
Tofu: Press it well, brown it on two sides, and use a smaller amount of boldly seasoned liquid. Our bok choy and tofu green curry follows the same idea.
Common braising mistakes and how to fix them
The problem |
What may have happened |
What to do |
The meat is tough |
It probably needs more time |
Cover the pan and cook for another 30 minutes before checking again |
The meat is dry and stringy |
The cut may have been too lean, or the heat too high |
Lower the oven temperature next time and serve this batch with plenty of sauce |
The sear came out gray |
Its surface was damp, the pan was crowded, or the heat was too low |
Pat the meat dry, let the pan heat fully, and sear in batches |
The liquid cooked away |
The lid didn’t fit tightly, the oven ran hot, or there wasn’t enough liquid |
Add hot stock until the liquid reaches halfway up the meat, then cover the pan again |
The sauce is thin or greasy |
It needs to be skimmed and reduced |
Remove the meat, skim the fat, and simmer the liquid uncovered |
Braises also reheat well. Let the finished dish cool, refrigerate it in a covered container for up to three days, then reheat it gently. Any fat will firm up on the surface in the refrigerator, making it easy to lift away before reheating.
For cleanup, our guide to caring for ceramic nonstick cookware will help you take care of the pan once dinner is over.
Frequently asked questions
Do you have to sear meat before braising?
No, but it’s worth doing. Searing adds the browned flavor and color that give a braise depth. If time is short, focus on the largest, fattiest surfaces rather than browning every side.
Can you braise on the stovetop?
Yes. Use a heavy pan with a well-fitting lid and keep the heat low enough to maintain a gentle simmer. Turn the meat occasionally and check the liquid level during cooking. The oven requires less attention, but both methods can give you a tender braise.
Can you braise in a slow cooker or multicooker?
Yes. Brown the meat and aromatics first, then use less liquid than you would for an oven braise because sealed appliances allow very little evaporation.
Our Dream Cooker® lets you sear on sauté mode, then switch to slow cook without transferring the ingredients. Once the meat is tender, reduce the sauce separately if it needs more body.
Can you make a braise ahead of time?
Yes. Many braises are especially good the next day, once the meat has rested in its sauce. Cool and refrigerate the dish promptly, then reheat it gently on the stovetop or covered in a 300°F oven.


